
Phlebotomy Study Guide 2026: Complete Certification Exam Prep
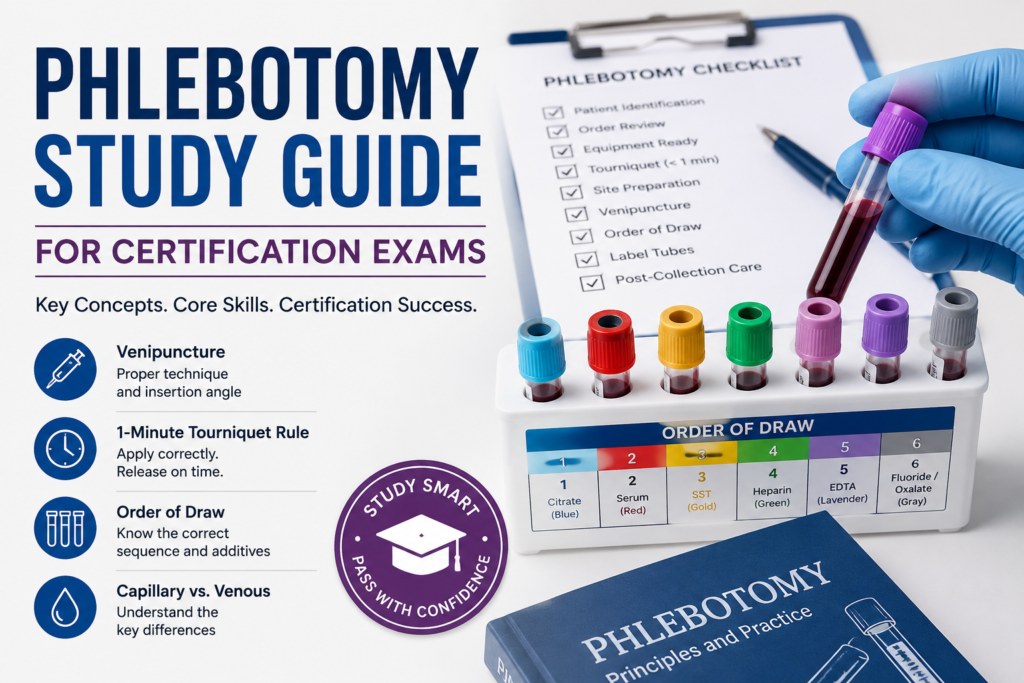
Whether you’re preparing for your first phlebotomy certification exam or brushing up before re-certification, passing requires more than memorizing tube colors and needle gauges. Today’s certification exams — from the NHA CPT, ASCP PBT, to the NCCT NCPT — are scenario-based, meaning they test whether you can think like a phlebotomist, not just recite facts.
This guide covers every major exam domain in full — venipuncture procedures, order of draw, pre-analytical errors, infection control, anatomy, specimen handling, and patient safety — with the clinical reasoning behind each topic explained clearly. Updated for 2026 exam content outlines, this guide reflects the latest domain weights and testing standards. By the time you finish, you’ll understand not just what to do but why each step matters, which is exactly what separates students who pass from those who don’t.
Use the domain breakdown table early in this guide to prioritize your study time by exam weight, and work through each section systematically. Let’s get started.
Educational Disclaimer: This phlebotomy study guide is intended for certification exam preparation and educational purposes only. Workplace procedures vary between laboratories, healthcare facilities, and jurisdictions. Always follow your employer’s current protocols and applicable standards from the CDC, OSHA, and your state regulatory bodies.
What Is Phlebotomy?
Phlebotomy is the clinical practice of puncturing a vein or skin surface to collect blood specimens for laboratory testing, blood donation, transfusions, therapeutic purposes, or diagnostic evaluation. A healthcare professional trained and credentialed to perform these procedures is called a phlebotomist.
Laboratory testing is the single largest source of clinical decision-making in modern medicine. Physicians rely on blood specimens to diagnose diseases, monitor chronic conditions, evaluate organ function, assess treatment effectiveness, and identify infections or metabolic abnormalities. According to clinical laboratory science principles, more than 70 percent of medical decisions are influenced by laboratory test results — which means that every blood draw a phlebotomist performs has a direct and measurable impact on patient care.
Because laboratory accuracy depends so heavily on specimen quality, proper collection technique is not optional — it is foundational. Even seemingly minor mistakes can have serious consequences. Prolonged tourniquet application can alter potassium and protein levels. Hemolysis can interfere with chemistry testing. Using the wrong collection tube can completely invalidate coagulation studies. This guide prepares you to prevent those errors before they happen.
What Does a Phlebotomist Do?
Phlebotomists are responsible for far more than drawing blood. Their work spans clinical judgment, patient communication, infection control, and laboratory quality — all of which directly affect diagnostic accuracy and patient safety.
Core Clinical Responsibilities
A practicing phlebotomist is responsible for verifying patient identity, selecting appropriate collection equipment, performing venipuncture and capillary puncture, labeling specimens accurately, maintaining specimen integrity during transport, following infection control procedures at every step, documenting collections in the medical record, and processing or routing specimens to the appropriate laboratory department.
Reducing Pre-Analytical Errors
One of the most important — and often underappreciated — functions of a phlebotomist is error prevention. Pre-analytical errors are mistakes that occur before a specimen reaches the analyzer, and they account for the majority of laboratory errors overall. These include specimen contamination, hemolysis, clotting in anticoagulated tubes, incorrect tube selection, insufficient specimen volume, delayed transport, and mislabeling. A well-trained phlebotomist is the laboratory’s primary defense against these failures.
Where Phlebotomists Work
Phlebotomists practice in hospitals, outpatient clinics, physician offices, reference laboratories, blood donation centers, long-term care facilities, public health agencies, occupational health settings, and mobile collection services. The scope of work differs across settings: hospital phlebotomists frequently collect specimens from critically ill or sedated patients with complex vascular access challenges, while outpatient phlebotomists focus primarily on routine diagnostic testing in ambulatory populations. Blood donation centers require specialized knowledge of donor eligibility and therapeutic collection procedures.
Phlebotomy Study Guide for Certification Exams
Most employers prefer or require professional certification for phlebotomy positions. The three most widely recognized certifying bodies in the United States are:
- National Healthcareer Association (NHA) — Certified Phlebotomy Technician (CPT)
- American Society for Clinical Pathology (ASCP) — Phlebotomy Technician (PBT)
- National Center for Competency Testing (NCCT) — National Certified Phlebotomy Technician (NCPT)
Phlebotomy Certification Exam Format: NHA CPT vs ASCP PBT vs NCCT NCPT
Before diving into study content, every candidate should understand exactly what they are walking into on exam day. Here is a complete breakdown of all three major certification exams.
NHA CPT (Certified Phlebotomy Technician)
The NHA CPT consists of 120 total questions — 100 scored and 20 unscored pretest questions — with a 2-hour time limit. The exam can be taken either in-person at an approved testing center or online through remote proctoring. To pass, candidates need a minimum scaled score of 390 out of 500. This score is not a direct percentage of correct answers — it is adjusted based on the difficulty of the specific exam version you receive, ensuring fairness across all test administrations.
| Detail | NHA CPT |
|---|---|
| Total Questions | 120 (100 scored + 20 unscored) |
| Time Limit | 2 hours |
| Passing Score | 390 out of 500 (scaled) |
| Exam Cost | $155 |
| Certification Valid | 2 years |
| Renewal Requirement | 10 CEUs |
| Format | Computer-based, in-person or online |
NHA CPT Domain Weights:
| Domain | Exam Weight |
|---|---|
| Routine Blood Collection | 32% |
| Specimen Processing | 20% |
| Safety and Compliance | 18% |
| Special Collections | 16% |
| Patient Preparation | 14% |
ASCP PBT (Phlebotomy Technician)
The ASCP PBT exam is scheduled for 2 hours and contains 80 questions. The ASCP Board of Certification uses criterion-referenced computerized adaptive testing (CAT) — meaning the exam adjusts to your ability level in real time. When you answer correctly, the next question is slightly harder. When you answer incorrectly, a slightly easier question follows. To pass the ASCP PBT exam you need a score of 400, with possible scores ranging from 0 to 900.
| Detail | ASCP PBT |
|---|---|
| Total Questions | 80 |
| Time Limit | 2 hours |
| Passing Score | 400 out of 900 (scaled) |
| Exam Cost | $155 |
| Format | Computerized Adaptive Testing (CAT) |
| Certification Valid | 3 years |
NCCT NCPT (National Certified Phlebotomy Technician)
The NCPT exam contains a total of 125 scored questions plus 25 unscored questions, with a time limit of 3 hours. The unscored questions are used by test administrators to validate questions for future exam versions. To pass the NCPT you need a scaled score of at least 390, with scores ranging from 200 to 500.
| Detail | NCCT NCPT |
|---|---|
| Total Questions | 150 (125 scored + 25 unscored) |
| Time Limit | 3 hours |
| Passing Score | 390 out of 500 (scaled) |
| Exam Cost | $90–$135 |
| Format | Computer-based |
| Certification Valid | 5 years |
Side-by-Side Comparison
| Feature | NHA CPT | ASCP PBT | NCCT NCPT |
|---|---|---|---|
| Total Questions | 120 | 80 | 150 |
| Scored Questions | 100 | 80 | 125 |
| Time Limit | 2 hours | 2 hours | 3 hours |
| Passing Score | 390/500 | 400/900 | 390/500 |
| Exam Cost | $155 | $155 | $90–$135 |
| Adaptive Testing | No | Yes (CAT) | No |
| Certification Valid | 2 years | 3 years | 5 years |
Which exam should you choose?
- Choose NHA CPT if your employer specifically requests it — it is the most commonly required by hospitals and clinics
- Choose ASCP PBT if you plan to work in a clinical laboratory setting — ASCP carries strong recognition among laboratory professionals
- Choose NCCT NCPT if you want the longest certification validity period (5 years) and a lower exam cost
Want a quick baseline before you start? Try our 30-question phlebotomy practice exam to identify your weak areas first.
Phlebotomy Certification Exam Domain Breakdown
Every phlebotomy certification exam — NHA CPT, ASCP PBT, and NCCT NCPT — organizes its content into defined topic domains with assigned exam weights, though the exact number, structure, and naming of domains varies by certifying body. This guide is organized around six core phlebotomy knowledge areas that align closely with the content tested across major certification exams and reflect the NHA CPT framework, one of the most widely recognized phlebotomy certification models in the United States.
Understanding these domains helps you focus your study time effectively, because not all topics carry equal emphasis on exam day. Each domain section below also links to a dedicated practice quiz so you can immediately reinforce what you’ve learned.
How to use this table: Prioritize your study sessions based on exam emphasis. Routine Blood Collection is consistently one of the largest and most heavily tested content areas across major phlebotomy certification exams, making it an excellent starting point for most students. Then work through the remaining domains systematically. Do not underestimate Patient Preparation — concepts such as patient identification, requisition review, and pre-collection factors appear frequently on certification exams and are common sources of errors in clinical practice.
Domain 1: Anatomy and Physiology
Anatomy questions are frequently paired with clinical reasoning. Rather than asking you to name a structure, exams describe a scenario — a patient’s vein is rolling, or blood is bright red and pulsatile — and ask what anatomical fact explains it or what the phlebotomist should do.
Key facts this domain tests most frequently: the three antecubital veins in order of preference with the clinical reason for each ranking, the difference between plasma and serum, and the three stages of hemostasis.
The Circulatory System
The circulatory system continuously transports oxygen, nutrients, hormones, metabolic waste products, and immune cells throughout the body. Blood flows through three vessel types: arteries carry blood away from the heart under high pressure; veins return blood to the heart under lower pressure; and capillaries are microscopic vessels where the exchange of oxygen, nutrients, and waste products occurs between blood and surrounding tissues.
For routine venipuncture, veins are the preferred access point because they lie closer to the skin surface, are easier to palpate, and operate under significantly lower pressure than arteries — making puncture safer and easier to control.
Components of Blood
Understanding blood composition helps phlebotomists select the correct tube for each test:
| Component | Description | Clinical Relevance |
|---|---|---|
| Plasma | Liquid portion containing proteins, electrolytes, nutrients, hormones, and clotting factors | Collected in anticoagulated tubes; used for coagulation and plasma chemistry |
| Serum | Plasma minus clotting factors; produced after coagulation | Collected in red or gold tubes; used for most chemistry and serology testing |
| Red Blood Cells (RBCs) | Oxygen-carrying cells containing hemoglobin | Tested in hematology; hemolysis of RBCs contaminates specimens |
| White Blood Cells (WBCs) | Immune cells that defend against infection | Counted in complete blood counts (CBC) |
| Platelets | Cell fragments that initiate clot formation | Assessed in coagulation studies and platelet counts |
Major Veins Used in Venipuncture
The antecubital fossa — the area at the bend of the elbow — is the standard site for routine venipuncture. Three veins are located here:
Median Cubital Vein: This is the preferred collection site for most patients. It is well-anchored to surrounding tissue (meaning it rolls less), has a consistent diameter, is relatively superficial, and carries a lower risk of nerve or arterial injury than the other antecubital veins. It should always be assessed first.
Cephalic Vein: Located on the lateral (thumb) side of the antecubital fossa. It tends to roll more than the median cubital vein and may be more difficult to access, but is an acceptable alternative when the median cubital vein is not suitable.
Basilic Vein: Located on the medial (inner) side of the antecubital fossa. This vein is used as a last resort in the antecubital area because nerves and the brachial artery run nearby, increasing the risk of inadvertent nerve or arterial puncture. Extra caution is required.
Hemostasis
Hemostasis is the physiological process the body uses to stop bleeding after vascular injury. It occurs in three stages: vascular spasm (constriction of the injured vessel), platelet plug formation, and the coagulation cascade that produces a fibrin clot. Understanding hemostasis helps phlebotomists recognize patients at increased bleeding risk — such as those taking anticoagulants like warfarin or heparin — and adjust post-puncture pressure accordingly.
To learn more about hemostasis and the body’s clotting process, read our Phlebotomy Anatomy and Physiology Study Guide. After reviewing the material, test your knowledge with the Phlebotomy Anatomy and Physiology Quiz.
Domain 2: Patient Preparation
This domain is underestimated by many students but appears on every certification exam. Questions often describe a realistic workplace situation — a patient refuses, information is missing from the requisition, or a pre-collection factor is overlooked — and ask what the phlebotomist should do.
Key facts this domain tests most frequently: the correct two-identifier verification process, factors that affect laboratory results before collection, how to handle patient refusal, and HIPAA basics.
Patient Identification
Patient identification is not a formality — it is a critical safety checkpoint. Misidentification errors are among the most dangerous in all of healthcare and are a leading cause of wrong-patient transfusions, incorrect treatment, and diagnostic harm.
Before any collection, verify the patient’s identity using at least two independent identifiers. Acceptable identifiers include full legal name, date of birth, and medical record number. In inpatient settings, always compare these identifiers against the patient’s wristband — do not rely solely on verbal confirmation. Ask the patient to state their name and date of birth — do not read the name aloud and ask the patient to confirm, as this may lead to passive agreement.
Never collect from an unidentified patient or a patient whose wristband is missing or illegible without following your facility’s escalation protocol.
The Requisition Form
The test requisition — whether paper or electronic (CPOE — Computerized Physician Order Entry) — is the legal order for specimen collection. Before drawing, verify that:
- The requisition matches the patient
- All requested tests are clearly listed
- Any special instructions are noted (fasting, timed collection, chain-of-custody)
- The ordering provider information is present
If the requisition is missing, unclear, or conflicts with the patient’s information, do not collect until the discrepancy is resolved and documented. A missing or incomplete requisition is grounds to withhold collection — never guess or substitute tests.
Factors That Affect Laboratory Results
Several pre-collection patient factors can alter test results independent of collection technique:
Fasting: Many chemistry tests — including glucose, lipid panels, and iron studies — require the patient to have fasted for 8–12 hours before collection. Always confirm fasting status before collecting fasting specimens and document it.
Hydration Status: Dehydration concentrates the blood, artificially elevating many analytes. It also makes veins smaller, more fragile, and harder to access.
Recent Exercise: Vigorous physical activity within hours of collection can temporarily elevate glucose, lactate, creatine kinase (CK), and other enzyme levels.
Posture: Transitioning from lying down to standing causes a fluid shift from the intravascular space into tissues, which can concentrate large molecules like proteins and cholesterol by 5–10%.
Diurnal Variation: Certain hormones, particularly cortisol and iron, fluctuate predictably throughout the day. Timed collections for these tests must be performed at the specified time.
Anxiety and Stress: Acute stress can transiently elevate cortisol, glucose, and catecholamine levels. A calm, reassuring approach during collection is both a clinical and an ethical responsibility.
Special Patient Populations
Pediatric Patients: Use age-appropriate language to explain the procedure. Enlist a parent or caregiver for positioning and comfort support. Use the smallest appropriate needle gauge and consider butterfly needles. Capillary puncture is preferred for small volume tests. Never restrain a child without proper protocol and documentation.
Geriatric Patients: Aging produces physiological changes that directly affect venipuncture: loss of subcutaneous tissue causes veins to roll; thinning skin is more easily damaged; anticoagulant use is very common. Use a gentle technique, avoid excessive taping on fragile skin, and allow longer post-puncture pressure time.
Patients With IV Lines: Blood collected proximal to an IV catheter will be contaminated by the infused fluid. Whenever possible, collect from the opposite arm. Specimens collected through IV lines must be clearly documented as such.
Patients With Mastectomy or Lymphedema: Venipuncture on the affected side of a mastectomy patient or on an extremity with lymphedema is contraindicated in most facilities without a physician’s explicit order. Always ask about mastectomy history or upper limb lymphedema before selecting a site.
Patients With AV Fistulas: An arteriovenous (AV) fistula is a surgically created connection between an artery and a vein used for hemodialysis access. These must never be used for routine phlebotomy — puncture risks serious infection and can damage this life-sustaining dialysis access.
Patient Refusal
Every competent adult patient has the right to refuse a blood draw. If a patient refuses, do not proceed. Calmly explain the clinical importance of the test, answer their questions honestly, and give them the opportunity to reconsider. If they maintain their refusal, document it clearly in the medical record, notify the ordering provider, and do not retaliate or argue.
HIPAA and Patient Confidentiality
The Health Insurance Portability and Accountability Act (HIPAA) establishes federal standards for the privacy and security of protected health information (PHI). A patient’s identity, test orders, diagnosis, and results are all PHI. Phlebotomists must not discuss patient information in public areas, share results with unauthorized parties, or leave specimens or paperwork where others can view patient identifiers. Violations are reportable and can result in significant legal and professional consequences.
Scope of Practice
Phlebotomists must practice within their defined scope. A phlebotomist must not interpret laboratory results for patients or family members — this is the responsibility of the ordering provider. If a patient asks what their results mean, the appropriate response is to direct them to their physician or care team.
To learn more about patient communication, informed consent, patient identification, and other essential pre-collection procedures, read our Phlebotomy Patient Preparation Study Guide. Once you’ve reviewed the material, reinforce your understanding by taking the Phlebotomy Patient Preparation Quiz to assess your knowledge before the certification exam.
Domain 3: Routine Blood Collection
Routine blood collection and specimen collection procedures represent one of the most heavily tested content areas across major phlebotomy certification exams.. Questions test your ability to perform venipuncture correctly, recognize procedural errors, select appropriate equipment, and apply the correct order of draw. Scenario-based questions in this domain typically describe a collection situation and ask you to identify what went wrong or what the phlebotomist should do next.
Key facts this domain tests most frequently: the correct needle insertion angle, the 1-minute tourniquet rule, the full order of draw sequence with additives, and the difference between capillary and venous order of draw.
Essential Phlebotomy Equipment
Selecting appropriate equipment before collection is a clinical decision, not a routine task. Equipment choice directly affects specimen quality and patient comfort.
Needles: Phlebotomy needles are classified by gauge and length. Gauge refers to the diameter of the needle lumen — and critically, smaller gauge numbers indicate larger needle diameters. This is one of the most frequently tested facts on certification exams.
| Gauge | Diameter | Typical Use |
|---|---|---|
| 21 gauge | Large | Routine adult venipuncture on healthy veins |
| 22 gauge | Medium | Standard adult venipuncture; good all-purpose choice |
| 23 gauge | Small | Fragile or small veins; butterfly needle sets |
| 25 gauge | Very small | Pediatric patients; very fragile or difficult veins |
Using a needle that is too small (higher gauge) can increase the risk of hemolysis due to the shear force exerted on red blood cells as blood passes through a narrow lumen at high velocity.
Butterfly Needles (Winged Infusion Sets): Preferred for pediatric patients, geriatric patients with fragile or rolling veins, hand veins, and any difficult venous access situation.
Evacuated Tube System (ETS): Uses precisely calibrated vacuum pressure to draw a predetermined volume of blood directly into collection tubes. ETS is the standard of care for routine venipuncture in most healthcare facilities.
Syringes: Offer manual control of blood flow and are useful for fragile veins that may collapse under ETS vacuum. Blood collected by syringe must be transferred immediately to collection tubes using a syringe transfer device — never by pushing blood forcefully through the needle, which causes hemolysis.
Tourniquets: Applied 3–4 inches above the intended puncture site. Do not leave in place for more than 1 minute before needle insertion — prolonged application causes hemoconcentration and falsely elevated potassium levels.
The 15-Step Venipuncture Procedure
Each step serves a specific purpose. Omitting or rushing any step creates measurable risk for the patient or the specimen.
Step 1: Review the Requisition and Gather Supplies Confirm the test order, identify any special requirements, and assemble all necessary equipment before approaching the patient.
Step 2: Perform Hand Hygiene Wash hands with soap and water for at least 20 seconds, or use an alcohol-based hand rub. Perform hand hygiene before patient contact, before applying gloves, after removing gloves, and after handling any specimen.
Step 3: Identify the Patient and Verify the Requisition Use two independent identifiers. Ask the patient to state their name and date of birth. Match identifiers to the requisition before proceeding.
Step 4: Explain the Procedure and Obtain Verbal Cooperation Briefly explain what you are going to do in plain language. If a patient refuses, respect their decision, document the refusal, and notify the ordering provider.
Step 5: Apply PPE Apply gloves before any patient contact. Additional PPE may be required depending on the patient’s isolation status.
Step 6: Position the Patient and Apply the Tourniquet Have the patient extend the arm with the elbow slightly extended and supported. Apply the tourniquet 3–4 inches above the intended puncture site. Do not allow it to remain in place for more than one minute.
Step 7: Select and Palpate the Vein Assess the antecubital fossa by palpating — not just looking. The median cubital vein is preferred. Avoid bruised, hardened, infected, or scarred sites.
Step 8: Cleanse the Site Wipe the site with a 70% isopropyl alcohol prep pad using a circular outward motion. Allow to dry completely — approximately 30–60 seconds. Never insert the needle into a wet alcohol site.
Step 9: Insert the Needle Anchor the vein with your non-dominant thumb. Insert the needle bevel-up at a 15–30 degree angle. Blood flashback into the hub confirms successful venous access.
Step 10: Collect Specimens in Correct Order of Draw Attach collection tubes in the correct order of draw. Gently invert each additive tube immediately after filling. Do not shake tubes vigorously.
Step 11: Release the Tourniquet Release as soon as blood flow is confirmed and before removing the needle whenever possible.
Step 12: Remove the Needle and Apply Pressure Remove smoothly, immediately activate the safety device, and apply gauze with firm pressure. Do not bend the arm at the elbow — this increases hematoma risk.
Step 13: Dispose of the Needle Immediately Drop directly into an approved puncture-resistant sharps container. Never recap, bend, or carry an unprotected needle.
Step 14: Label Specimens at the Bedside Label each tube immediately after collection, in the presence of the patient. Labels must include: patient full name, date of birth, medical record number, date and time of collection, and collector identification.
Step 15: Assess the Patient Before Leaving Check the puncture site for bleeding or hematoma. Ensure the patient feels well. Apply a bandage. Document the collection.
Order of Draw and Tube Additives
The order of draw prevents additive carryover — the contamination of one tube’s specimen with residual additive from the previous tube’s stopper or needle hub.
| Draw Order | Tube Color | Additive | Primary Use |
|---|---|---|---|
| 1 | Yellow (Blood Culture) | SPS (Sodium Polyanethol Sulfonate) | Microbiology / Blood cultures |
| 2 | Light Blue | Sodium Citrate | Coagulation studies (PT, PTT, INR) |
| 3 | Red | None or Clot Activator | Serum testing, blood bank |
| 4 | Gold / SST | Gel + Clot Activator | Chemistry, serology |
| 5 | Green | Heparin (lithium or sodium) | Plasma chemistry testing |
| 6 | Lavender / Purple | EDTA | Hematology (CBC, blood smear) |
| 7 | Pink | EDTA | Blood bank / Crossmatch |
| 8 | Gray | Sodium Fluoride + Potassium Oxalate | Glucose, lactate |
Memory Tip: “Stop Light, Red, Go Green, Let People Give”
Why Additive Carryover Matters:
- EDTA carryover into a chemistry tube falsely elevates potassium and lowers calcium
- Citrate carryover dilutes coagulation specimens, causing prolonged clotting times
- Heparin carryover into the light blue tube disrupts coagulation testing
If a light blue tube is the only tube being drawn, a short discard tube must be drawn first to remove tissue thromboplastin introduced during needle puncture, which would otherwise falsely shorten coagulation times.
Proper Tube Mixing: Invert gently — never shake. EDTA: 8 inversions; citrate: 3–4; SST: 5.
Capillary Puncture Procedures
Capillary puncture (dermal puncture) is indicated when only a small specimen volume is needed, when venous access is not feasible, or for point-of-care testing.
Adult Sites: The lateral aspects of the third or fourth finger of the non-dominant hand. Avoid the fingertip, index finger, and thumb.
Infant Sites: Heel puncture on the medial or lateral plantar surface. Never puncture the posterior curvature or central plantar area — the calcaneus (heel bone) is dangerously close to the skin surface in infants, and incorrect puncture can cause osteomyelitis.
Technique: Warm the site for 3–5 minutes. Wipe away the first drop of blood — it contains tissue fluid that dilutes the specimen. Collect subsequent drops without milking or squeezing.
Capillary Order of Draw:
- Blood gases (most time-sensitive)
- EDTA tubes
- Other additive tubes
- Serum tubes (last)
Common Venipuncture Complications
Hematoma: Most common complication. Remove needle immediately, apply firm pressure for 2–3 minutes, elevate the arm, document.
Syncope (Fainting): Warning signs include pallor, sweating, dizziness, and nausea. Stop the draw immediately, remove the needle, apply pressure, recline the patient, apply a cool cloth, and monitor continuously.
Nerve Injury: If the patient reports sharp, shooting, or radiating pain during insertion, withdraw the needle immediately and document the incident.
Collapsed Veins: Common in elderly or dehydrated patients. Switch to a smaller vacuum tube, use a syringe, or select a butterfly needle.
Arterial Puncture: Identified by bright red, pulsatile blood. Apply firm pressure for at least 5 minutes and document. Recollect by venipuncture.
Petechiae: Small red spots from micro-hemorrhages caused by prolonged tourniquet. Release the tourniquet promptly.
To gain a complete understanding of blood collection procedures, read our Phlebotomy Routine Blood Collection Study Guide, where you’ll learn the step-by-step techniques, safety protocols, and best practices required for accurate specimen collection. Once you’ve reviewed the material, reinforce your learning by taking the Phlebotomy Routine Blood Collection Quiz to evaluate your knowledge and identify areas for improvement.
Domain 4: Special Collections
Certain tests require collection procedures that deviate from the standard venipuncture protocol. Failure to follow the correct procedure will invalidate the test.
Key facts this domain tests most frequently: blood culture aseptic technique, GTT timing requirements, chain-of-custody documentation, and timed specimen collection rules.
Blood Cultures
Blood cultures require strict aseptic technique to prevent environmental contamination, which would produce false-positive results. The collection site must be cleansed with chlorhexidine gluconate (or povidone-iodine, per facility protocol) and allowed to fully dry. Blood culture bottle tops must also be disinfected before inoculation. Blood cultures are always collected first in the order of draw.
Timed Specimens
Some tests require collection at a specific time of day (e.g., morning cortisol, fasting lipids) or at a specific interval after a drug dose (e.g., therapeutic drug monitoring — peak and trough levels). The exact collection time must be documented on the specimen label and requisition. Even a small deviation in timing can produce clinically misleading results.
Chain-of-Custody Collections
Specimens collected for legal or forensic purposes—such as workplace drug testing, blood alcohol testing, or paternity testing—must follow strict chain-of-custody procedures. This process includes verifying patient identity, documenting each transfer of the specimen, using tamper-evident seals, obtaining required signatures, and maintaining an unbroken record of everyone who handles the specimen from collection through laboratory analysis. Any break in the chain of custody can compromise specimen integrity and may render the results legally inadmissible.
To learn more about forensic specimen collection, therapeutic drug monitoring, blood cultures, glucose tolerance testing, and other specialized procedures, read our Phlebotomy Special Collections Study Guide. After reviewing the material, reinforce your understanding by taking the Phlebotomy Special Collections Quiz to evaluate your knowledge and prepare for the NHA CPT certification exam.
Domain 5: Specimen Processing
Pre-analytical errors — those occurring before the specimen reaches the analyzer — account for approximately 60–70% of all laboratory errors. This domain is heavily scenario-based — exam questions describe a specimen problem and ask you to identify its cause, or describe a collection technique and ask whether it will produce a valid specimen.
Key facts this domain tests most frequently: hemolysis causes and which lab tests it affects, the 5 required labeling elements, the 30-minute SST clot time rule, and the complete list of specimen rejection criteria.
Specimen Labeling
Every specimen must be labeled immediately after collection, at the patient’s side. Required label information includes:
- Patient full name
- Date of birth
- Medical record number
- Date and time of collection
- Collector’s name or ID
Pre-printed barcode labels are preferred because they reduce transcription errors. Never transfer a label from one tube to another.
Specimen Transport
| Specimen Type | Transport Requirement |
|---|---|
| Ammonia, lactic acid, some coagulation factors | Ice slurry — temperature sensitive |
| Bilirubin, folate, vitamins | Protect from light |
| Coagulation studies, blood gases, glucose | Rapid transport — delayed processing alters results |
Centrifugation
Serum and plasma specimens require centrifugation to separate the liquid portion from cellular components. SST (gold/tiger top) tubes require a clot time of at least 30 minutes before centrifugation — premature centrifugation produces fibrin strands that clog analyzers. After centrifugation, inspect the specimen for hemolysis, lipemia, or icterus.
Specimen Rejection Criteria
Specimens are rejected by the laboratory when they cannot produce a valid result:
| Rejection Reason | Root Cause |
|---|---|
| Hemolysis | Traumatic collection, small needle, vigorous mixing, improper transport |
| Clotting in anticoagulated tube | Insufficient mixing, under-fill, delayed processing |
| Insufficient volume (short draw) | Collapsed vein, early needle withdrawal |
| Wrong tube type | Incorrect order of draw, additive mismatch |
| Unlabeled or mislabeled specimen | Labeling performed away from patient |
| Improper storage or transport | Temperature excursion, excessive transport time |
| Lipemia | Patient non-compliance with fasting |
| Expired collection tube | Quality failure; vacuum loss |
Pre-Analytical Errors in Detail
Hemolysis: The rupture of red blood cells releasing intracellular contents into the specimen. It is the most common pre-analytical error and produces falsely elevated results for potassium, LDH, and AST.
Causes include: traumatic venipuncture, use of a needle that is too small with a syringe, forcing blood through the needle during syringe transfer, vigorous tube shaking, drawing through an IV catheter, prolonged tourniquet application, collecting from a hematoma site, and temperature extremes during transport.
Hemoconcentration: Prolonged tourniquet application causes plasma water to shift into surrounding tissues, artificially concentrating proteins, lipids, red blood cells, and enzymes. Produces falsely elevated results. Always limit tourniquet time to 1 minute or less.
Clotting in Anticoagulated Tubes: When anticoagulated tubes are not mixed immediately, blood may begin clotting. Clots in light blue, lavender, or green tubes invalidate results entirely.
Short Draws: Under-filling a tube disrupts the required blood-to-additive ratio. A light blue tube that is only half-filled has too much sodium citrate relative to blood, which artificially prolongs clotting times.
Mislabeling: The most dangerous pre-analytical error because it is undetectable by the laboratory analyzer. A mislabeled specimen produces results that look perfectly normal but belong to the wrong patient. Consequences include transfusing blood of the wrong type or failing to diagnose the correct patient.
Additive Carryover: Trace additive from one tube contaminates the next. Prevented by following the correct order of draw consistently.
Quality Assurance
Specimen Integrity: Every specimen must be evaluated for hemolysis, lipemia, icterus, clotting, and volume adequacy before sending to the laboratory.
Rejection Tracking: Facilities that monitor specimen rejection rates can identify systemic problems and target training accordingly.
Delta Checks: Laboratories compare a patient’s current result to their previous result. A dramatic change flags for review. The phlebotomist who collected an incorrectly labeled or compromised specimen may be the
To learn more about specimen labeling, handling, transportation, storage requirements, quality assurance, and common pre-analytical errors, read our Phlebotomy Specimen Processing Study Guide. After studying these concepts, reinforce your understanding by taking the Phlebotomy Specimen Processing Quiz to evaluate your knowledge and prepare for the NHA CPT certification exam.
Domain 6: Safety and Compliance
This domain evaluates your knowledge of standard precautions, bloodborne pathogen regulations, and sharps safety. Exam questions may cite OSHA standards by name or describe an exposure scenario and ask what the phlebotomist must do.
Key facts this domain tests most frequently: the OSHA standard number (29 CFR 1910.1030), HBV survival time (7 days), the correct post-needlestick response steps, and which pathogen has no vaccine (HCV).
Standard Precautions
Standard precautions are the baseline infection control practices applied to every patient, every time, regardless of known or suspected diagnosis. They are based on the principle that all blood and body fluids must be treated as potentially infectious. Standard precautions include hand hygiene, appropriate PPE selection, safe handling and disposal of sharps, proper specimen containment, and environmental cleaning.
Bloodborne Pathogens
The three primary bloodborne pathogens of occupational concern are:
Hepatitis B Virus (HBV): Can survive outside the body for up to 7 days. HBV vaccination is strongly recommended and typically required for healthcare workers. Represents the highest occupational infection risk per needle exposure.
Hepatitis C Virus (HCV): A leading cause of chronic liver disease. No vaccine is currently available.
Human Immunodeficiency Virus (HIV): Significantly lower transmission risk than HBV per needle exposure, but a serious occupational concern.
The OSHA Bloodborne Pathogens Standard (29 CFR 1910.1030) legally requires healthcare employers to implement exposure control plans, provide PPE, offer HBV vaccination, establish post-exposure evaluation protocols, and maintain exposure records.
Needlestick Prevention
Needlestick injuries are the primary route of occupational bloodborne pathogen exposure in phlebotomy. Every needle should have an engineered sharps injury protection (ESIP) device. Key practices:
- Activate the safety device immediately after needle withdrawal using a one-handed technique
- Dispose of the activated needle directly into the sharps container without passing it to another person
- Never recap, bend, break, or remove a used needle from a syringe with two hands
- Keep the sharps container at point-of-care — never across the room
- Never overfill a sharps container beyond the fill line
Post-Exposure Protocol: If a needlestick or mucous membrane exposure occurs, immediately wash the site thoroughly with soap and water, report to a supervisor, and follow your facility’s exposure control protocol, which will include post-exposure prophylaxis evaluation.
Personal Protective Equipment (PPE)
Gloves are required for every blood collection procedure. Change gloves between patients and discard immediately after use. Additional PPE — face shield, gown, or respirator — is required based on the patient’s isolation precautions and your facility’s exposure control plan.
Hand Hygiene
Hand hygiene is the single most effective infection control measure available. Perform hand hygiene:
- Before patient contact
- Before applying gloves
- After removing gloves
- After handling any specimen or contaminated material
Wash with soap and water for at least 20 seconds, or use an alcohol-based hand rub and allow it to dry completely.
To learn more about infection prevention, OSHA regulations, standard and transmission-based precautions, personal protective equipment (PPE), sharps safety, and exposure control, read our Phlebotomy Safety and Compliance Study Guide. After reviewing these essential safety principles, reinforce your knowledge by taking the Phlebotomy Safety and Compliance Quiz to assess your understanding and prepare for the NHA CPT certification exam.
Study Tips and Exam Strategy
Prioritize Clinical Reasoning Over Memorization
Modern certification exams are scenario-based. A question about hemolysis is unlikely to ask “define hemolysis” — it is more likely to describe a collection scenario and ask you to identify what the phlebotomist did wrong. Build your understanding around why each procedure step exists, not just what it is.
Master the Order of Draw
The order of draw is tested on virtually every certification exam, often multiple times in different question formats. Practice it daily until it is automatic. Know not only the order but the additive in each tube and why carryover from the previous tube matters.
Study Errors Systematically
For each major error — hemolysis, hemoconcentration, mislabeling, short draw, additive carryover — know its cause, its laboratory impact (which tests it affects and in what direction), and how to prevent it.
Use Active Recall and Spaced Repetition
Passive re-reading is the least effective study method. Use flashcards, practice questions, and recall exercises. Space your review sessions over days and weeks. Build up gradually — start with a 20-question phlebotomy practice test, progress to a 50-question practice test, then take a full NHA phlebotomy practice test or complete mock exam to measure your final readiness.
Simulate the Complete Procedure
Practice the complete venipuncture procedure from start to finish — including patient identification, requisition review, tourniquet application, site selection, clean technique, and labeling — in a timed sequence. Muscle memory and procedural fluency reduce errors in real clinical settings. When you feel ready, test yourself with our 60-question phlebotomy practice test or the full 75-question phlebotomy exam.
Frequently Asked Questions
What is the preferred vein for routine venipuncture? The median cubital vein is the first choice for routine venipuncture. It is well-anchored, consistently accessible, carries a lower risk of nerve or arterial injury than the basilic vein, and is associated with fewer complications than the cephalic vein in most patients.
Why does the order of draw matter? The order of draw prevents additive carryover contamination. Each collection tube contains a specific additive — or no additive — that is matched to the test being run. Residual additive from one tube’s stopper can contaminate the next tube’s specimen and produce inaccurate results. Following the established order minimizes this risk.
What causes hemolysis during blood collection? Hemolysis results from physical damage to red blood cells. Common causes include traumatic venipuncture, use of an overly fine needle with a syringe, inserting the needle into a site where alcohol has not dried, vigorous tube shaking, excessive syringe aspiration force, and drawing through an IV catheter.
How long should the tourniquet remain in place? The tourniquet should remain in place for no longer than one minute before needle insertion. Release it as soon as blood flow is confirmed, and always before needle withdrawal when possible. Prolonged application causes hemoconcentration and falsely elevated potassium results.
What should I do if a patient faints during venipuncture? Immediately stop the draw and remove the needle. Apply pressure to the puncture site. Lower the patient’s head or recline them to improve cerebral blood flow. Apply a cool cloth to the forehead and neck. Remain with the patient, call for assistance if needed, monitor vital signs, and document the event once the patient is stabilized.
What is a discard tube and when is it needed? A discard tube is a plain (red or non-additive) tube drawn before a light blue coagulation tube when that is the only test being collected. It removes tissue thromboplastin introduced during needle insertion, which would otherwise falsely shorten coagulation times.
What are the most common reasons for specimen rejection? The most frequent rejection reasons are hemolysis, clotting in anticoagulated tubes, short draw (insufficient volume), incorrect tube type, and mislabeling. Each is preventable with proper technique and attention to procedure.
Is the phlebotomy certification exam difficult? Difficulty is directly proportional to preparation quality. Students who understand the clinical reasoning behind phlebotomy procedures — rather than simply memorizing facts — consistently perform better on scenario-based certification exams. Dedicated study using official practice materials, combined with practical procedure experience, is the most reliable preparation strategy.
Final Review: Everything That Matters
Phlebotomy is a precision discipline where technique, knowledge, and patient communication intersect directly with the quality of laboratory medicine. Every specimen you collect either supports or undermines a physician’s ability to make accurate clinical decisions.
For certification exam success and real-world competency, your preparation should center on the six core domains:
- Anatomy and Physiology — vein selection, blood composition, hemostasis
- Patient Preparation — identification, requisition, pre-collection factors, HIPAA
- Routine Blood Collection — venipuncture procedure, order of draw, capillary puncture
- Special Collections — blood cultures, GTT, timed draws, chain of custody
- Specimen Processing — labeling, transport, centrifugation, rejection criteria, error prevention
- Safety and Compliance — standard precautions, bloodborne pathogens, sharps safety, OSHA
True mastery of these six domains will prepare you not only to pass your certification exam but to practice phlebotomy in a way that genuinely serves patients and upholds the integrity of laboratory medicine.
Ready to test everything you have learned? Work through our 40-question phlebotomy practice quiz covering all six domains, then take the full phlebotomy practice exam mock test when you feel confident.
Authoritative References
- Centers for Disease Control and Prevention (CDC) — Infection Control Guidelines: cdc.gov
- Occupational Safety and Health Administration (OSHA) — Bloodborne Pathogens Standard (29 CFR 1910.1030): osha.gov
- Clinical and Laboratory Standards Institute (CLSI) — GP41: Collection of Diagnostic Venous Blood Specimens
- National Healthcareer Association (NHA) — CPT Exam Content Outline: nhanow.com
- American Society for Clinical Pathology (ASCP) — PBT Certification: ascp.org
- National Center for Competency Testing (NCCT) — NCPT Certification: ncctinc.com